Wednesday, May 8, 2013

The Little White Cottage 's Chimney

 Follow my blog with Bloglovin
My dollhouses have been featured in an e-magazine by Maria Angels from http://mafalda200minis.blogspot.com/
http://www.youblisher.com/p/615714-NR005/
Thank you Maria! You made an amazing magazine. I'm so pleased with the photos of my work in it. And there are so many incredible tutorials in this magazine. Go check it out. You'll be so happy with all the info.

Time to put a chimney on our Little White Cottage dollhouse.   I'm hiding the battery and switch inside.
 I have 2 side pieces that measure 6 2/8" x 2 2/8".  I cut a triangle off at the bottom that measures 2" at the bottom x 2 1/2" on the right x 3 1/8" so the sides sit straight on the roof.
 The front piece of the chimney is 5 6/8" x 2".
The back piece is   1 7/8" x 3 1/2".  I hot glued all the piece in place.
 I also hot glued the white light switch on the inside of the chimney.
For the exterior of the chimney, I use pre mixed concrete patch from Lowe's.  This concrete should be moist enough to stick to the wood.  **Sometimes air gets in the plastic tub of concrete drying it out a bit.  You'll notice the concrete is hard and very dough like.  You should see moisture in it.  If you don' have enough moisture just add a bit of water.  I usually spread some of the drier mix on the house and dip my artist spatula in water and mix it with the concrete right on the wall.  Try to work on a horizontal flat position if possible.  Spreading the concrete on a vertical surface is much harder.
I like to wait a couple of minutes after I have spread the concrete on all 4 sides of the chimney.

I want to carve some bricks in it.  But if not enough water has evaporated, your lines will just disappear.  I use an old Exacto knife to make my bricks.
The bricks I carve are freehand, imperfect and not perfect.  They are like handmade bricks.  This gives great character to your house. Let everything dry completely.

Time to paint.  I matched the house's exterior paint on the chimney - off white/cream.

 Then I used red and taupe paint.  I dipped my brush in the taupe and in a tiny bit of red.  What came out on each brick was a flesh colored pink.
Then I dabbed white paint to look like mildew on the bricks.


I also finally published my Fairytate Dollhouse how to book.   It's available on Etsy as a PDF or Blurb  as a PDF or  book.
Till next time!


Friday, May 3, 2013

Shabby Streamside Dollhouse & The Little White Cottage Dollhouse

 All done with the New York Times project.  She's on her way to New York.
I found this adorable sheer fabric for the curtains and I wanted to share it with you.  I got it at Jo-Ann's.  It is cream in color.  Just perfect for a vintage look.  It has glittery stars and dots in it that is perfect dollhouse size.
Now, back with the Little White Cottage dollhouse!  When I left off, I had painted the exterior of the dollhouses cream/off white.  Then I painted the rocks on the cottage.
The rocks are on the back side of the house and all around as foundation.
These are the paint colors I used.   A good rule is 4 different shades of brown, white, black, and an off white(mine is a linen color).
When I apply the colors, I use at least 2 different ones.  Here I dipped my brush in the black and linen colors.  It doesn't matter which color combination you use.  Just as long as each rock is a little different.


I went all around the house even under the front porch.

Next, hooking up the battery operated lights from Evan designs http://www.modeltrainsoftware.com/mi.html
For this little house I needed extra wire to be able to reach my hiding spot(the chimney).
 It's really easy. Black wire goes to black wire, red to red. That's it! I use the hair dryer to shrink the little protective sleeves that go over all the connections.

I'm not sure how the front porch light will look. I just popped a little bulb through a hole and will figure it out later.
Is anyone else having Blogger issues.  I can't upload pictures when I use Firefox. But it works on Google Chrome.  Just thought I'd pass this along.
hugs♥


Friday, April 26, 2013

My Email From the New York Times

I  received an email from the New York Times!!  They want to do a little story on the Shabby Chic dollhouse that I built after I saw Sandy's "My Shabby Streamside Studio."
So I need to build a new Shabby Chic dollhouse and send it to them to get photographed.  I'm so excited!! This story should come out at the end of May or early June.  I'll let you know for sure when I find out.

This means the Little White Cottage will have to wait a little bit. Hopefully, just about 1 week. Then I'll get back to showing you how to make the rest of the cottage. 

I'm making my way to everyone's blogs who left a comment. I'll get there I promise. I just have had so many things to do lately. But I'm thrilled to be good busy!!  For the new followers- If you leave a comment and don't have your profile enabled please leave me your website address or email. I love to reply to everyone. 

And finally, I want to take a moment to thank all of you for your great support.  I wouldn't be getting emails from the New York Times if it weren't for all you sweet souls out there. Your encouraging comments have really meant the world to me.  Thank you.


Wednesday, April 24, 2013

Little White Cottage Dollhouse

First off, Blurb(the publisher of my Shabby Chic Dollhouse book) sent me a coupon to share with all of you. It's another $10 off coupon.  The code to enter at checkout is
SHARING10
The link to my book is:
 http://www.blurb.com/my/book/detail/3740085-a-shabby-chic-dollhouse
This offer ends May 2, 2013.
I just heard it's only working on paper books and not the PDF version. :(    

O.K. back to building this Little White Cottage!
I am putting a little porch light above the front door.
I use this battery operated light kit from Evan Designs:  http://www.modeltrainsoftware.com/mi.html
They are a fabulous company to order from!  Keep the bulb  and wire on hand because we need to place it under the cardboard part coming up next.
I am putting cardboard on the outside that will look like siding.  I used the box the kit came in for this.  I traced the front of the house, marking the windows and door openings.  Then peel off one side revealing the corrugated/ridged part.
I like my dollhouses to be strong. So I butter the house with this pre mixed concrete patch.  This will be the glue for the cardboard as well.
Spread the concrete on with a spatula(artist spatula).   I'm going to thread the wire and bulb under the top window(see picture below). Apply the cardboard to the wet concrete.
I used a little piece of wood for the porch roof.  Doesn't really matter what size. Mine is 4 5/8" x 2 1/2". I used regular 3/8" dowels as my porch posts. I put them next to the porch roof and marked the angle I wanted to cut.
I drilled a whole wide enough for my bulb in the porch roof.
The porch floor is all left over pieces of wood.
 For the top of the porch(the floor), I used 3 boards that are 1" x 11" long. Glued them all together.
Then I built a simple skirt for the underside. My pieces here are 1" thick. The long one is 10 3/4" long. The side ones are 2 3/4" long.Glue on leaving a little lip/edge.


Glue onto front of the house.
Moving to the side of the house.  I cut more cardboard to use as siding. I left 1 1/2" at the bottom to carve a stone foundation which will extend to the front porch.


 The back is all concrete. 
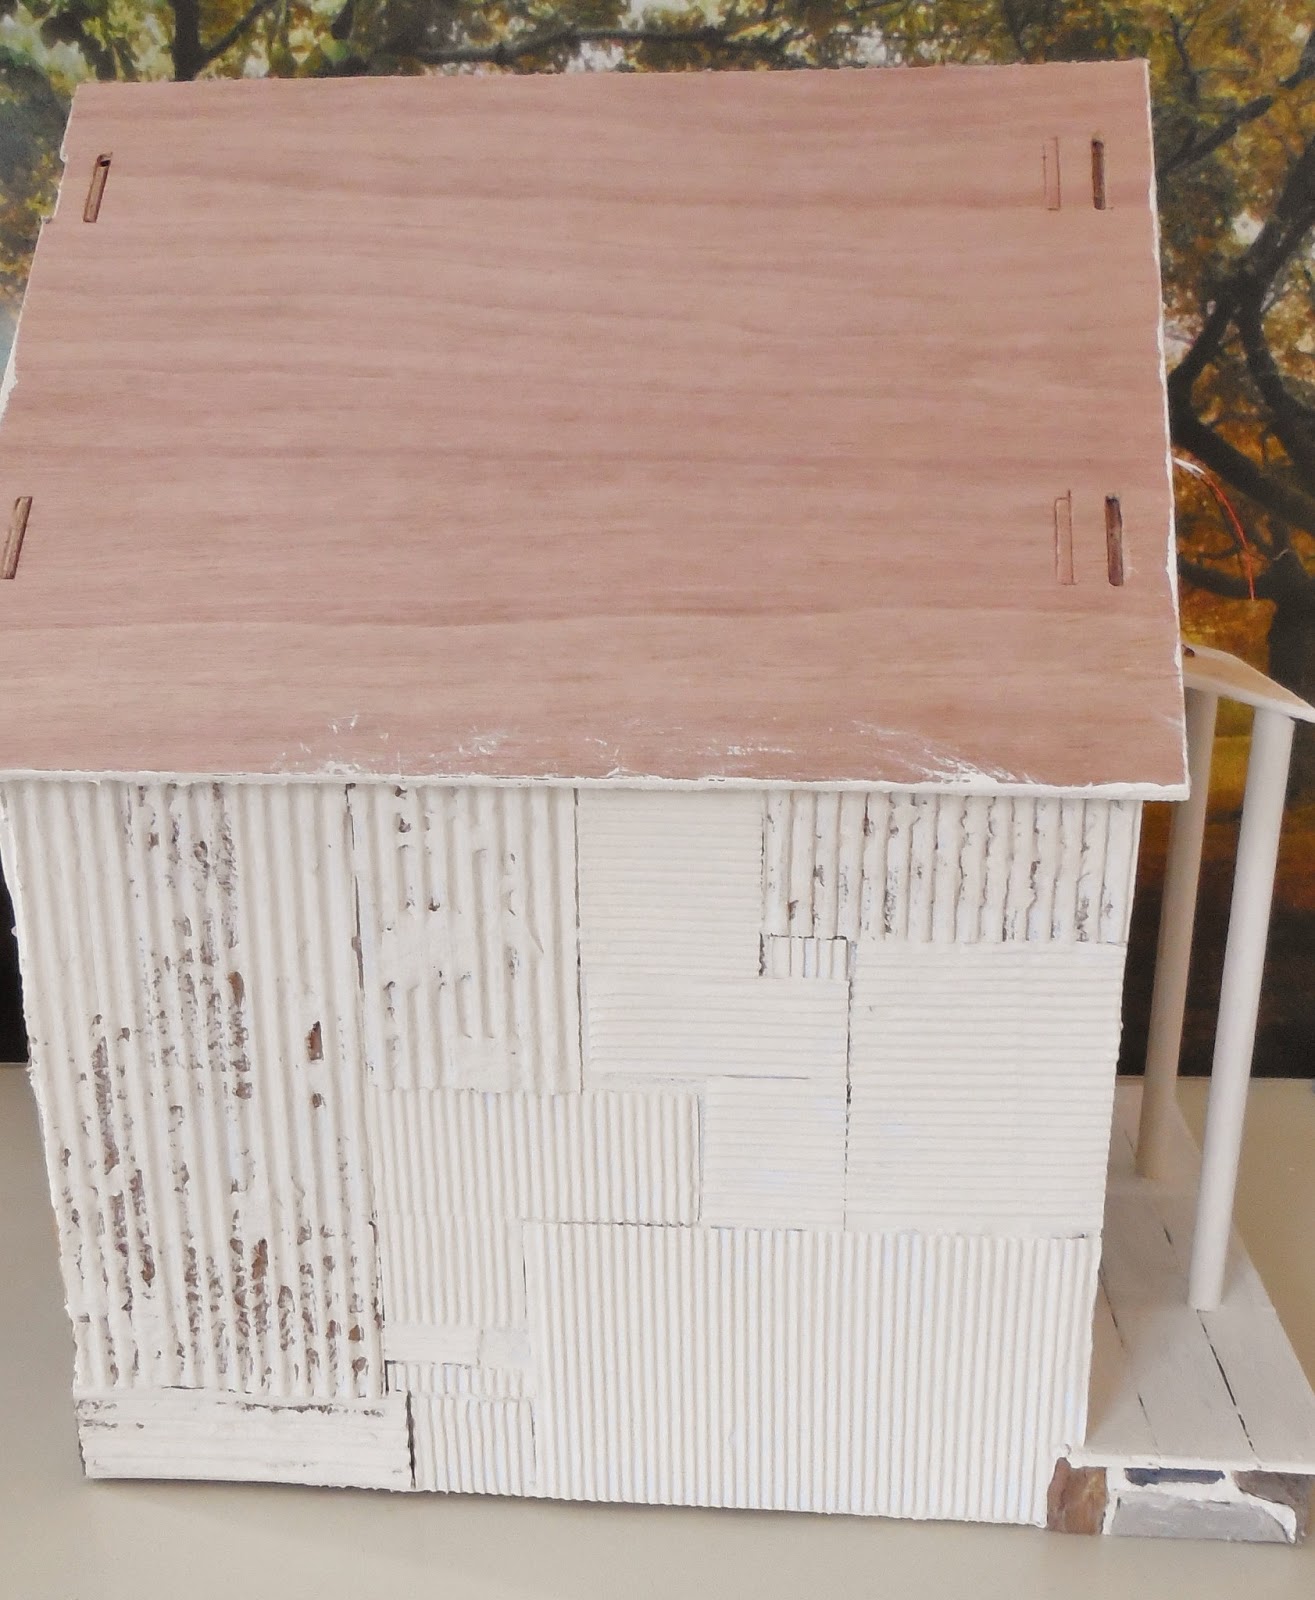
 On the other side of the house I am doing a patchwork of corrugated siding.
 Inside, I put in a chandelier.
And added a set of keys. I found these online. They are for jewelry making. Too cute!
Time to paint the house exterior.
 Don't do a perfect paint job! It has to look like an old cottage.
 Some of the brown cardboard shows through.
 I also painted all my "stones" white. Actually it's a cream colored paint.
I like the cream better between the  stones. The gray of the concrete looks too sterile and cold.  I'll show you how I paint the stones next time.
I also had a very exciting email. I'll let you know all about it as soon as I'm sure about this
 development.  :)
Hugs♥,