I know you're thinking Cupcake Shop? Where's Cinderella's Cottage. Little change of plans. Cinderella will have to wait a couple of weeks.
Marlyn contacted me a couple of days ago with a shabby chic cupcake shop dollhouse idea. She had seen this picture of the shop
Little Miss Cupcake and loved it.
So I doodled a little design and started this shop. I used the Buttercut kit. I made the changes I wanted. I changed the door from the middle to the left and made the front window into a 3 sided shop window and another tall window on the other side.
Here I glued the walls to the floor(the roof is just resting on top). I started off by trimming all the new windows and door.
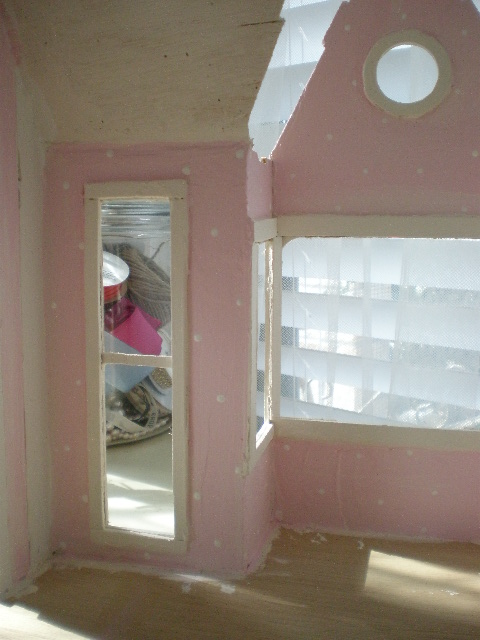
I plastered and painted the front wall and one side wall. I used a very happy pastel pink.
I made the stripes by first scoring the damp plaster. It turned out so well! It looks like a wide plank wainscoting.
I painted the other wall and put a wainscoting at the bottom.
And I painted some white dots on the all pink wall.
I wanted to print out some wallpaper from the internet. But to make it the right proportion I would have had to do so much photo shop. So I decided just to hand paint the roses. It was faster than messing with the computer and editing. I used pink, red, hot pink, cream and light green.
Voila!
Instant shabby chic roses wallpaper! I made the little mantle from left over wood.
I made the floor with pine Popsicle sticks.
This is the bay window on the side of the house. I made a Fleur de Lis design, but it's really hard to see here. The walls are cream and the window trims and ceiling gray.


Wow, amazing, can't believe you hand painted the roses. They look great.
ReplyDeleteLove everything you make!
Thank you so much Sarah!
ReplyDeleteThe roses on the wallpaper are my favorite...it is so pretty. Can't wait to see how this progresses....I want to try something like this later on down the road....I still have a dollhouse that I am trying to get out of the box!!
ReplyDeleteCaroline, adoro! Adoro o papel de parede com as florzinhas, adoro as risqinhas, adoro o ambiente. Está a ficar perfeito!
ReplyDeleteBeijinhos
Inês
It's just so darn pretty!!! The roses on the wall are gorgeous! =)
ReplyDeleteThanks Lataina! Roses this small are pretty easy to do I have to say!
ReplyDeleteit's very very pretty
ReplyDeleteThis is lovely! I can't wait to see the final product. Thank you so much for doing this!
ReplyDeleteI'm so impressed with your hand painted roses. Gorgeous. Looking forward to seeing this develop. Judith x
ReplyDeleteMe encanta como la estas empapelando son preciosos y el suelo es genial, te va a quedar fantastica.
ReplyDeleteFeliz fin de semana
besitos ascension
I'm so glad you all love the roses!
ReplyDeleteThank you so much!
It's so gorgeous (like all of your work)! I can't wait to see more!
ReplyDeleteJennifer
OMG......here we go again.....total love. I just adore that you decided better time management was to 'paint your wallpaper'......you crack me up and at the same time inspire me!!
ReplyDelete'xox Rella
What a YUMMY project! I LOVE it! Your kit bashing is very inspiring! And I know what you mean that it can be easier to paint the wallpaper! I LOVE your work!
ReplyDelete