
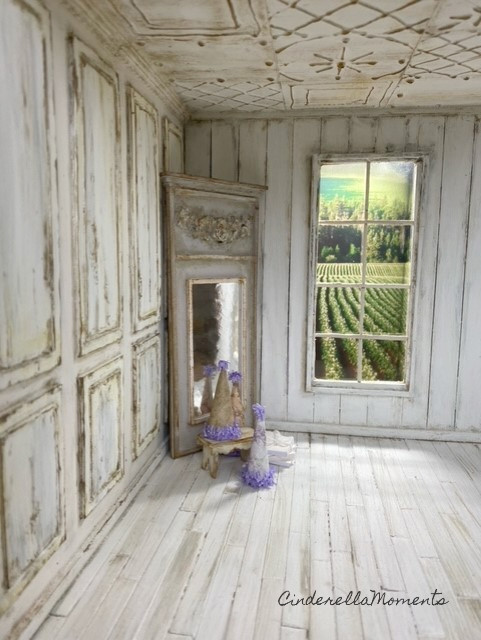
I have always planned to make a roombox to take photos of smaller items I make or just Inspo/inspiration pics for my Instagram. After years of procrastinating I HAVE DONE IT! LOL!
This roombox is overall 10 1/2" x 10 1/8" x almost 9 3/4".
The front side is 10 1/2".
I didn't take many pictures. But I will tell you how I did it.
-I started off with scrap pieces of wood. I had a piece of plywood in my drawer waiting for years. I always knew this would be my boombox floor someday. That floor is 10 1/2" x 10". The rest of the project is tempered hardboard.
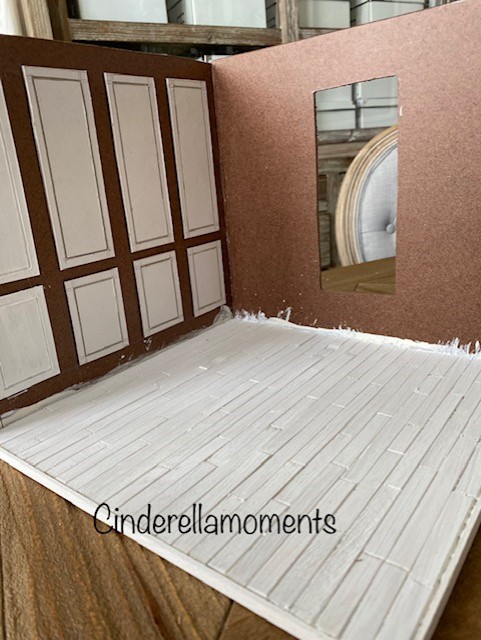 -Next, I hot glued in my Popsicle stick floor and added trim edges to the sides of the floor. Those trims are bass wood I cut 10 1/2" x 1/4" for the front piece. And 10" x 1/4" for the side one. I painted it all white with normal acrylic paint. I made sure that the white paint went in all the cracks.
-Then I cut out 2 walls. One wall is 10 1/8" x 9 1/4" tall.
The other is 10 1/4" x 9 1/4"tall. This is my back wall with the window. The window opening is 2 5/8" wide x 6 1/4" tall and I have it 1 5/8" from the bottom of the wall.
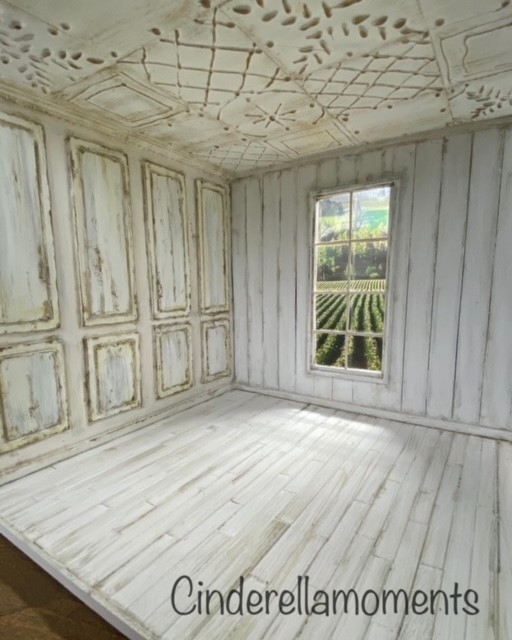
I later decided a ceiling was needed.
-The ceiling is the same measurement as the floor 10 1/2" x 10".
I hot glued all the pieces together. I use a professional hot glue gun. You just want your glue gun to reach a super hot temperature. The better the hot glue stick is melted the better it will bond the surfaces. Don't use one of those tiny hot glue guns.
-My side wall is a classic French picture molding accent wall. I used chipboard cardboard to make it. I cut out 4 rectangles that are 2 1/2" x 1 3/4" for the bottom row. And 4 rectangles 4 7/8" x 1 3/4" for the top row.
I have a very sharp small utility knife(you can also take an X-acto knife) to cut out a channel. A rectangle within the rectangle. I kept it 3/16" away from the edge and the cut out a groove about 1/16" or 2/16" wide. These measurements are not too important. It's what looks good to you. Dig out the cardboard in the groove with the tip of your knife. Don't go too deep or you'll end up with a hole. Which is not the end of the world since there's a wall behind it. So don't freak out if you make a mistake.
- I used white glue to glue those in because you can move them around a bit if you need to adjust.
I glued them 1/2" from the top for the top ones and 1/2" from the bottom for the bottom ones. I eyeballed the space in between. They are about 5/8" apart.

-I hot glued the roof on. And I put on the ceiling trim. I had dental moulding for one call and 1/8" bass strip for the clapboard wall.
-I made "tin" tiles for my ceiling using my hot glue technique: http://www.cinderellamoments.com/2010/07/shabby-chic-dollhouse-tin-tiles.html
You can get sheets of embossed tiles in miniature stores or Hobby Lobby. You can find embossed cardboard sheets in the scrapbook section of any craft store. Or you can plaster the ceiling. Whatever works for you.
-I also trimmed out the window using strips of the bass wood.
-Paint everything white again.

That's it for now. I have not done the exterior of now. I may decide I need an exterior in the future. We will see!
I hope everyone has a terrific week!
***By The way, in case you want lights and fire in your boombox or a dollhouse ~
This is what I buy:
-I get this package with these options:
https://evandesigns.com/products/miniaturist-lighting-package
I get 4 lights, warm color, 1 battery, 8 inch wire coin cell holder, and 14" wire for led wire length.
-the fire:
https://evandesigns.com/products/fire-led-kitI get the 1.8mm
3 volt with battery and switch/holder
14 inch wires
-I also get extra wire:
https://evandesigns.com/products/kynar-hook-up-wirethe 25 ft. and I get a red and a black.

Preciosa!!! Gracias por las explicaciones.
ReplyDeleteGreat idea to have a roombox and thanks for the tuto.
ReplyDeleteGeneviève
Thank you so much for all of this information!! I adore your dollhouses and this room box!
ReplyDeleteComo siempre, un interior precioso !!!!
ReplyDeleteMe encanta el espejo !!
Muchas gracias por el tutorial y por el enlace.
Fantastica Caroline!!! Un lavoro magnifico, come sempre!
ReplyDeleteNadia, da Venezia
Lovely! I would love to see a video on how to do this.
ReplyDeleteWhat a fun and detailed DIY roombox photo setup — this kind of creative use of clear plastics really inspires more crafting ideas! In packaging industries and beyond, using quality materials like PVC Shrink Film can protect and present projects or products with excellent clarity and finish, whether it’s for display models or retail items. For those looking for reliable shrink film solutions, PVC Shrink Film from Kingchuan Packaging offers durability and premium clarity that enhances both protection and presentation.
ReplyDelete