I'm often asked what I use to cut out my dollhouses.To tell you the truth I have not found that perfect saw. If you are a saw manufacturer out there and you think you have the perfect compact tool to work on dollhouses contact me. I'd love to share your product with my readers. Until that happens let me tell you what I use.
They are very simple tools actually. My favorite thing to use is box cutters. Along with a metal ruler they do an excellent job with precise, clean cuts. If the wood is a little thick I cut both front and back sides. It usually works.
But when the wood is way too thick and too hard it requires a power tool. A few years back I bought a Dremel Trio. Come to find out it's been discontinued! The good thing about the Dremel is that it's pretty compact(compared to most saws and routers). The bad thing is that the cuts are pretty ugly! After I cut out windows and doors I have to sand each side straight. And don't forget earplugs or your ears will be ringing for hours.
Before the Trio I had tried several rotary tools like the Back and Decker and Dremel with saw attachments. But the saw blades burn out. And I must admit it's a little scary to have that little spinning wheel of sharpness ready to take off digits with any false move.
Maybe a scroll saw? I'm not sure. If any of you have experience with a scroll saw leave a message after this post. I'd love to hear your opinions. At this point I've decided to stop wasting money on useless tools that don't work for dollhouse purposes and keep piling up in my workspace. But I'll keep looking. If that perfect cutting tool should ever fall into my hands I will most definitely share it with all of you.
Good luck and be careful out there!
hugs♥,
Showing posts with label customized. Show all posts
Wednesday, July 22, 2015
Thursday, October 9, 2014
Baking with Brinlie - My new Customized Blythe Doll
I finished my 4th Blythe Doll. Her name is Brinlie. Blythe dolls were originally made in the 70s. These 12 inch dolls have a string in the back of the head to change their eyes to 4 different colors.
I sanded her face and backplate. I carved her lips, nose, noseholes, phyltrum, chin and the area above her lips. I did a faceup with new lip color, freckles, color around the eyes, blush. She got new eyelashes and I painted her eyelids blue with roses. I added a pull cord and charm to make her sleepy eyes, corrected her gaze, and boggled the eyes.
She has a pink mixer with pink icing in the bowl.
My Mom thinks all my Blythe dolls look like naughty, tantrum throwing, stubborn little girls. LOL! :D
I made the pants and apron.
I had these boots. They were hot pink to begin. I painted them to have a more shabby chic look.
Her body is a Licca body. The legs bend and are pose-able. And the arms are really flexible.
Her pink mixer has a bowl filled with pink icing.
She has long blonde Alpaca hair. This hair comes from Princess, a Grand Champion Alpaca. I got it from ShangriLaRanch on Etsy.
Thanks for coming over and visiting with Brinlie!
♥ Brinlie is on her way home to meet her new Mom, Cindy! Thanks for adopting her Cindy! ♥
I sanded her face and backplate. I carved her lips, nose, noseholes, phyltrum, chin and the area above her lips. I did a faceup with new lip color, freckles, color around the eyes, blush. She got new eyelashes and I painted her eyelids blue with roses. I added a pull cord and charm to make her sleepy eyes, corrected her gaze, and boggled the eyes.
She has a pink mixer with pink icing in the bowl.
My Mom thinks all my Blythe dolls look like naughty, tantrum throwing, stubborn little girls. LOL! :D
I had these boots. They were hot pink to begin. I painted them to have a more shabby chic look.
Her body is a Licca body. The legs bend and are pose-able. And the arms are really flexible.
Her pink mixer has a bowl filled with pink icing.
She has long blonde Alpaca hair. This hair comes from Princess, a Grand Champion Alpaca. I got it from ShangriLaRanch on Etsy.
Thanks for coming over and visiting with Brinlie!
♥ Brinlie is on her way home to meet her new Mom, Cindy! Thanks for adopting her Cindy! ♥
Thursday, July 14, 2011
The Shabby Chic Cupcake Shop Dollhouse
I know you're thinking Cupcake Shop? Where's Cinderella's Cottage. Little change of plans. Cinderella will have to wait a couple of weeks.
Marlyn contacted me a couple of days ago with a shabby chic cupcake shop dollhouse idea. She had seen this picture of the shop Little Miss Cupcake and loved it.
So I doodled a little design and started this shop. I used the Buttercut kit. I made the changes I wanted. I changed the door from the middle to the left and made the front window into a 3 sided shop window and another tall window on the other side.
Here I glued the walls to the floor(the roof is just resting on top). I started off by trimming all the new windows and door.
I plastered and painted the front wall and one side wall. I used a very happy pastel pink.
I made the stripes by first scoring the damp plaster. It turned out so well! It looks like a wide plank wainscoting.
I painted the other wall and put a wainscoting at the bottom.
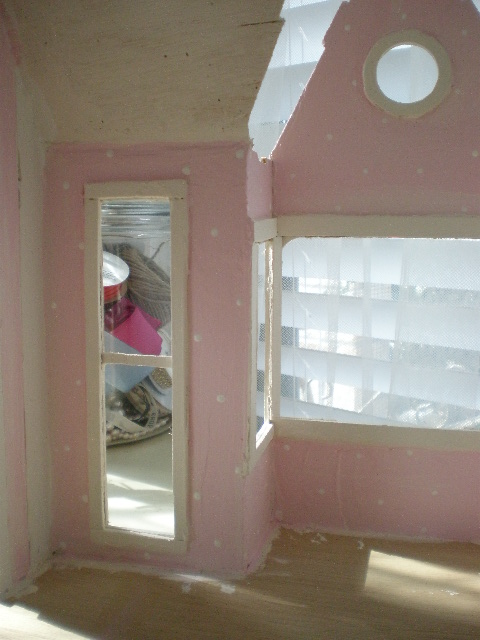
And I painted some white dots on the all pink wall.
I wanted to print out some wallpaper from the internet. But to make it the right proportion I would have had to do so much photo shop. So I decided just to hand paint the roses. It was faster than messing with the computer and editing. I used pink, red, hot pink, cream and light green.
Voila!Instant shabby chic roses wallpaper! I made the little mantle from left over wood.
I made the floor with pine Popsicle sticks.
This is the bay window on the side of the house. I made a Fleur de Lis design, but it's really hard to see here. The walls are cream and the window trims and ceiling gray.
Marlyn contacted me a couple of days ago with a shabby chic cupcake shop dollhouse idea. She had seen this picture of the shop Little Miss Cupcake and loved it.
So I doodled a little design and started this shop. I used the Buttercut kit. I made the changes I wanted. I changed the door from the middle to the left and made the front window into a 3 sided shop window and another tall window on the other side.
Here I glued the walls to the floor(the roof is just resting on top). I started off by trimming all the new windows and door.
I plastered and painted the front wall and one side wall. I used a very happy pastel pink.
I made the stripes by first scoring the damp plaster. It turned out so well! It looks like a wide plank wainscoting.
I painted the other wall and put a wainscoting at the bottom.
And I painted some white dots on the all pink wall.
I wanted to print out some wallpaper from the internet. But to make it the right proportion I would have had to do so much photo shop. So I decided just to hand paint the roses. It was faster than messing with the computer and editing. I used pink, red, hot pink, cream and light green.
Voila!Instant shabby chic roses wallpaper! I made the little mantle from left over wood.
I made the floor with pine Popsicle sticks.
This is the bay window on the side of the house. I made a Fleur de Lis design, but it's really hard to see here. The walls are cream and the window trims and ceiling gray.
Thursday, May 5, 2011
Subscribe to:
Posts (Atom)